The July challenge comes from Sketchy's Kitchen who has a minor obsession with molecular cuisine. The Challenge: Skate, traditional flavors powdered (slightly altered). Sketchy picked a dish from Grant Achatz, found in the Alinea cookbook - page 23 - a recipe that could be completed without having to order a bunch of specialized chemicals or powders. As Sketchy says “Just a little work and you can make this, the techniques are not very hard and only require a few tools”. At first I was daunted by this challenge, but I’m glad I had a go at it. I've learnt so much. Thanks Sketchy for a great challenge!!!!!!
In a nutshell, molecular cuisine (the science of deliciousness) is the end product of “Molecular and Physical Gastronomy”, a term coined in the 1980s by Herve This, a French scientist, and a Hungarian physicist Nicholas Kurti. It is the application of the study of scientific principles and practices in cooking and food preparation.
What has come from this is the interest of chefs and foodies applying the techniques of the food scientists to fine dining - using drying, liquefying, gassing, freezing (using things like liquid nitrogen and infa-red laser to name just a few) to transform ingredients into different forms and textures while still maintaining the flavours of the foods. After searching on the internet, what I did seemed was more like playing with my food. Have a quick look at the ‘Big Guns’ in Molecular Cuisine . It is utterly fascinating.
Here is the recipe as given by Sketchy
Skate, Traditional Flavors Powdered
4 skate wings (cod or flounder - I couldn't get skate at the market, so I used flounder)
* Beurre monte
* 300g fresh green beans (slice each beans into very thin rounds - 2 mm)
sea salt/kosher salt
1 banana
454g butter - 4 sticks
300g lemons
5g citric acid/vitamin c tablet
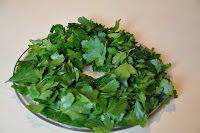
150g cilantro
150g parsley
100g dried banana chips
300g spray dried cream powder (or powdered milk)
100g cup minced red onion
200g capers (brined, not oil)
Beurre Monte
454g butter (4 sticks, 1 pound) cubed and frozen
60g water.
In a small saucepan, bring the water to a boil, then remove from heat and whisk in the butter 1 cube at a time to form an emulsion. It is important that the butter is very cold and added only a little bit at a time. Keep it heated, but under 98C degrees to keep it as and emulsion - this is your poaching liquid.
The poaching liquid is pretty much butter, but if you like, it could be replaced with other poaching methods such as water or wine with bay leaf, garlic clove, pepper, etc.
Powders
The original instructions were to use a dehydrator and coffee grinder to make the powders. I don't have either. I used the microwave method. I only have an old 500W microwave, used primarily for melting chocolate and butter etc, so it took a bit longer than time given in the challenge. I finished drying off in the oven. Unfortunately, I didn't keep a record of the exact times, but it didn't take too long (approximately 8 to 10 minutes for most things until the ingredients were dry then a slow oven for approximately 10 minutes to make sure they were dry). Once dried, all powders were ground using a mortar and pestle then passed through a fine mesh strainer. The drying wasn't a task as I took it slow and did it over a the weekend.

I used caper powder, citrus powder, Italian parsley powder, Hungarian sweet paprika (always readily available in my kitchen and it looked so pretty with the other colours) and 'brown butter' powder. I didn't use the red onion powder or cilantro powder as I don't like the taste (I also think that I may have burnt the onion a little).
For the citrus powder:
I first zested the lemons, removed the pith, then poached the zest in the simple syrup three times, dried it with paper towels then dried as above.
Simple syrup is made from 1 part water to 2 parts sugar. Bring the water to the boil, dissolve the sugar and the citric acid in the boiling water. Once the sugar is dissolved turn the flame off.
For the parsley powder - blanch the parsley in boiling saltwater for 1 second, submerge the leaves in ice water for 3 minutes. Dry on paper towels and then process as above.
For the caper powder, use capers packed in brine/vinegar. Run the capers under cold water for two minutes to remove some of the brine then dry on paper towel, then proceed as above. Check the moisture content and stir them, repeating at 30 second intervals until they are dry. Once dry, pulse and sift the powder.
For the brown butter powder, use unsweetened dried bananas if possible. I could only get dried bananas coated in honey which were a bit sweet for my liking.
If you cannot find the cream powder, you can substitute non fat dry milk powder, or even carnation instant milk powder. The substitutions will alter the flavor a little, but you will still get the general idea.
Preheat the oven to 350 degrees, sift the cream powder into a fine layer on a silpat or on parchment. Bake for 4 minutes, then remove for heat. If it bakes for too long, it will burn. Be very cautious with all powders in the oven. They all go from browned to burnt in a few seconds.
Grind the banana chips in the mortar and mix with the toasted cream powder. Pass this through a sieve and reserve.
Prepare the Beans: Bring 100g water, 100g beurre monte, and green bean rounds to a boil over high heat. Cook until the water has evaporated (about 3 minutes), when the pan is almost dry, remove it from heat and season with 3g salt.
Prepare the Fish: Bring 300g water and 300g beurre monte to simmer over medium heat, add the fish and simmer for 2 minutes. Remove the pan from heat and flip the fish over and let rest in pan for two more minutes. Transfer to a warming tray lined with parchment and season with 5 grams of fine sea salt.
Plating:
Take the tip of a small spoon and make a small mound of the citrus powder, the caper powder, and the parsley powder. Swirl these around in a hurricane type pattern. I found that it is easier, and you get finer lines if you lightly shake the plate to flatten out the mounds, then swirl the spoon through it to get the pattern.
Peel the remaining banana into very think slices (3mm) fan three slices on the plate, place green beans on top and place skate wing portion on top. On the tall edge, sprinkle the brown butter powder.
Although my plating is reminiscent of Australian Aboriginal Art with it's swirls and dots, it didn't start out that way and wasn't supposed to be. It just took on a life of it's own.
I spent a lot of time trying to get the swirls just right. I used the handle of a teaspoon to draw the spirals and practiced so!!!!!!!! much before I did the final plate. It took a lot of patience and that's also why my design ended up so sparse. I went through a lot of the powder. I did this all before I cooked the fish and beans so ended up having a late dinner. I was getting mighty hungry. Basically - I played with my food (something our mums never approved of) and spend too!!!!!!!! much time doing it.
I felt it was all very interesting, with an explosion of taste with every bite. But I am still definitely a fresh food gal and will stick with fresh food with only a flutter now and then into the unknown.
Have a look at the Daring Cooks Blogroll to see what the other Daring Cooks have done with this challenge.